| A funny easy housewarming gift! Make
sure your recipient has a sense of humor. This gift was
cheap and got lots of laughs from everyone who saw it. So first go
buy yourself a plunger. I tried to find one at the dollar stores,
but was unsuccessful so I ended up at Wal-Mart and it was under $3.00.
Grab a cute picture frame. This one is also from Wal-Mart by
better homes and gardens. I was looking for a scroll type picture
frame so it would be easy to tie on with ribbon. Next you need
toilet paper. Put it all together, I am not sure you need
directions as it is so simple.... ;) I printed out the little phrase "Welcome to homeownership, Hope nothing craps out on you!" and put it in the picture frame. Now give to your new homeowner and hope they love it too! Plus it's all useful things they can use in their new home. |
Tuesday, August 27, 2013
Plunger Housewarming Gift
Saturday, August 24, 2013
Poker Themed Stamped Coasters From Tiles
 |
Wanted to show you
all some different stamped coasters I recently made. I made these for
an avid poker fan who intends to give them away to her poker buddies. I
made 80 of these little things!
Tiles from lowes, stayz on ink, sticky back felt, rubber stamps and
finishing wax. If you want to know how they were made you can go here to find my original post about them.
|
Bread Board iPad Stand
 |
After pinning some
recipes on Pinterest I decided, this week... I am going to cook! Yes, a
rare occasion in our home! So I ran some of the pins by the husband and
decided to go grocery shopping. While spending the week cooking the
recipes from Pinterest off my ipad I thought, this is annoying. My ipad
wouldn't stay propped up against the wall and I was kinda of a pain in
the butt to keep it out of my way on the counter all while trying not to
get food on it. So I figures there has to be something better. I have
an ipad stand made from rice and it's not good for much. I turned to
Pinterest. I searched DIY ipad stand and this cute little breadboard
stand popped up from
diyandcrafttutorials.com. As I continued my search, I couldn't find
anything that peeked my interest near as much as this one. I spent a
few weeks looking for just the right bread board and I couldn't find
anything that I wanted. I was frustrated and gave up. Then last weekend my cousin said we needed a craft day. So I was like hmm? I can make that stand. I gave up on trying to find the perfect board and ended up with this one from amazon. It arrived just in time for craft day and to have my husband make me a "wedge" for the back. I stole from my scrabble game for the tray the ipad sits in. I couldn't see buying one online for the price they wanted and I had a scrabble game just sitting there. I can't say we have ever played scrabble with anyone else but the two of us and I figured one missing stand wouldn't hurt anything. Plus who plays scrabble anymore with Words With Friends around? Right? Anyhow, I just used wood glue to attach the pieces. Simple enough. I sanded the whole thing down so paint would stick to it. I started with white spray paint which wasn't covering well so I moved on to regular white interior paint. After two coats of paint, I looked at it and thought this isn't what I had in mind at all. Also the one I was inspired by was distressed and I kind of wanted that feel. I decided I am going to distress this and if it turns out looking like crap then I will just spray paint it with my glittery rustoleum flat chestnut spray paint. So off to the garage for stain I went. First I decided to use some sand paper to rough up the edges a bit and take off the white paint down to the wood. I covered the entire thing with dark wood stain and lightly wiped it off. I decided ok, this isn't so bad. It has character. Looks better than the solid white. It has personality. I like it. I had bought a W sticker from hobby lobby on sale for 40 percent off in the fall decor section and I slapped it in the middle. I'm loving it. Can't wait to use it in the kitchen! |
 |
|
 |
Labels:
breadboard,
craft,
crafts,
cutting board,
DIY,
ipad,
ipad stand,
paint,
stain,
wood glue.,
wood projects
Painted Crown Royal Bottle & Glass Vase
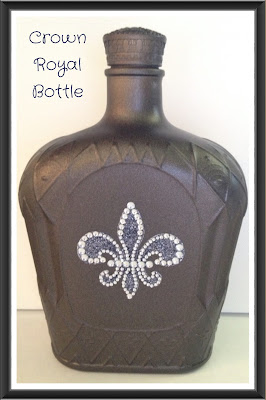
So seeing these cute little painted crown royal bottles from turnstylevogue.com I couldn't resit calling up my cousin to see if he had any empty bottles I could use. Of course he obliged me with an empty bottle and I set out to Home Depot for some rustoleum flat chestnut spray paint. It has a hint of glitter that catches the eye. I had or originally bought a black fleur-de-lis but it was too big for the bottle so back to hobby lobby for new ideas. Suggest no more than 3in wide and 4in high. I made a DIY painting booth out of a card board box and went to town lightly covering the bottle. I choose to spray the lid separately. By not having the lid on it, I was able to stick my finger in the top to turn the bottle around thus avoiding fingerprints or waiting for one side to dry! I have no patience and don't like to wait. Good thing it was a nice hot sunny day and it dried quick. Once dry I was able to affix my jeweled sticker on the front.
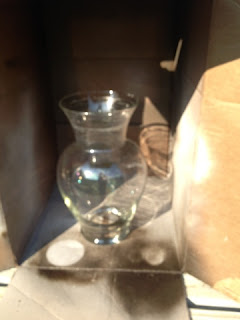
Once I finished with the crown royal bottle I decided to paint a vase. Why not? I have plenty and I had an extra sticker that was begging to be used on something. I think the vase turned out cute too.
And if I get sick of looking at the fluer-de-lis then I can just turn them around! Maybe I will fill the vase with some fall flowers? Fall is coming soon and it already has a fall tone.

Modge Podge Holiday Decor
 Need a little holiday decor? A simple, cheap, easy DIY? Could even involve the kids. Choose the words you want to decorate with and go to Michaels or Hobby Lobby and get some letters. Any kind you want, wood, metal, chipboard. I chose to buy the chipboard letters since they are $1.99 each. Once I decided on the letters, I carried them over to the paper isle to pick out holiday sheets that were large enough to cover each letter. Then all you need is some modge podge, some paint to match your paper and a foam brush or two. Start by painting the edges of your letters as they will not be covered by your decorative paper. Once the edges are dry lay your sheets of paper face down and place your letter on top of the paper (backwards of course) and trace around the letter. Next cut out your tracing. Next modge podge your letter and press the paper onto it smoothing it out as you go. Once it dries apply another layer of modge podge. I chose not to attach my letters together for easy storage after the holidays, but you could always do that with a flat bracket.
Subscribe to:
Posts (Atom)


